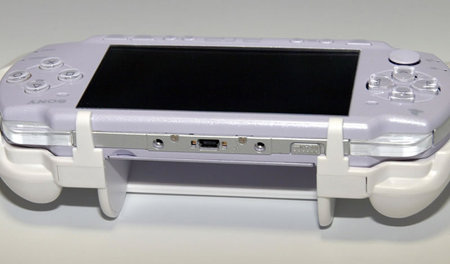
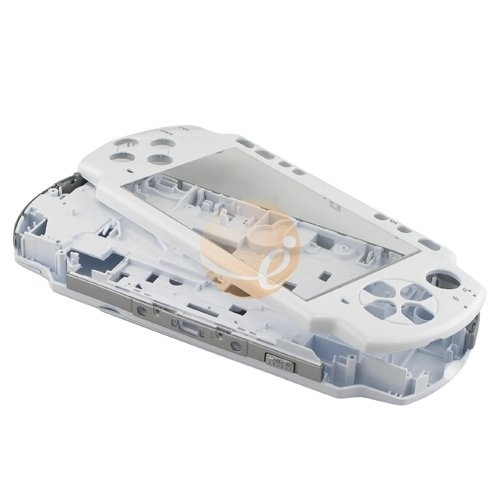
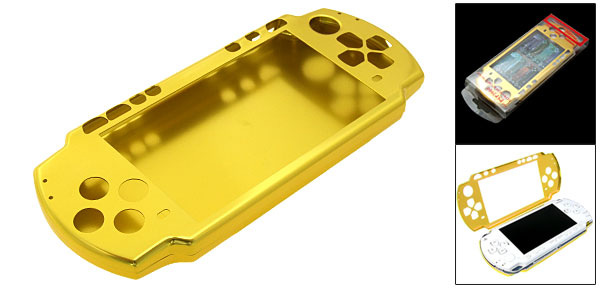
However , you might love your PSP, you won't have to love its faceplate. Unfortunately, the PSP's design doesn't accommodate easy customization, and changing the faceplate is not as simple as just popping an old faceplate off. However, if you've got a mini-screwdriver set, you possibly can reprogram your PSP faceplate manually. But be warned: switching your PSP's faceplate will void your PSP's warranty, since you have to get it apart so as to alter the faceplate. Prepare the PSP 2000 CaseAs with any major surgical operation, you'll have to prepare the sufferer adequately before proceeding. Because you will end up opening it up and exposing its internal parts, you will need to fix it thoroughly before opening it down. Make use of a soft, damp cloth to take out any dust or particulates that could contaminate the lining on the PSP. Also always remove any games inside the UMD drive, the PSP's memory card, the battery door and the battery itself. jklzaeqc 1102 Get rid of the Old Faceplate Position the PSP with their face down on the flat surface and employ a mini screwdriver to clear out the 2 screws from the back with the PSP. Once these are actually removed, you will notice two more hidden within the battery plate plus the warranty sticker. Remove these too. Set all of those screws aside. The PSP's analog nub will now be loose. Lift this and remove the 2 screws through the exposed analog unit. Then pull the latest PSP 2000 Repair Parts face off to expose the PSP's insides. Assemble the revolutionary Faceplate Grab your brand-new faceplate and screw the analog unit on the analog unit space. Then remove plastic face button covers on the exposed PSP and push them into their respective spaces within the new faceplate. Do a similar with all the row of buttons at the base in the device. Placed the New Faceplate On In fact the buttons have been assembled around the new faceplate, it's time to wear it the PSP. Simply put the faceplate over the PSP after which gently switch it to the site replace each screws beneath the battery cover. Then place the battery cover back on and replace the 2 external screws. You now have a brand new faceplate with your PSP 2000 Housing Case.
Nintendo has sold countless copies of that DS hand-held video gaming system. The DS features dual screens and touch controls authorized by the use of a pencil-like accessory termed as stylus. The DS also posesses a light to point the charge higher level of the battery. In the event the light will never turn on and you are having difficulty operating the DS you can look at some troubleshooting steps to help you fix the problem. Instructions 1. Check to see when the dsi battery power is charged. The DS charger light ought to be green when it is fully charged and red whether it is running low on power. When the light doesn't think about it at all the power supply may not be charged. 2. Turn the potency of the hand-held off. Wait for a few moments and then turn the DS back to check if the lights comes on. 3. Turn off the energy and remove a game cartridge you are inserted. Re-insert the overall game and turn the DS power back on. 4. Guarantee the AC adapter is fully connected to a wall outlet you might be the dsi charger. 5. Participate in the DS in warmer areas. Temperatures below 50 degrees Fahrenheit can have a poor affect on battery performance. jklzaeqc 1031
There are many PSP 2000 Housing Case entirely on store shelves, but a majority of lack a design which fits look, or perhaps a price that suits your pocketbook. Other factory-made PSP bags may have your PSP looking just like everyone else's, that can cause confusion when friends meet up. Instead, make your, unique PSP case. Instructions 1. Measure the height, width and depth of this PSP. Measure the screen opening. You will have to cut out a place to help you to call at your screen. Protract flaps on the top and bottom for into the other, similar to the lids of cereal boxes close. 2. Gather a piece of cardboard bigger than the whole area size of your PSP. Make use of the box the PSP entered in the event you still have it. 3. Use a ruler or other straight edge to draw the dimensions of the PSP for the cardboard. Leave folds and also the thickness of the cardboard. One more drawing could consider looking much like your PSP in case you took the duvet off and spread it flat. Add an opening where it can slide inside and outside. 4. Cut the extra cardboard away. Scissors leave straggly edges, so make use of a straight razor for clean lines. Make use of a flat edge that can help fold down the lines. You will have to make the fold as sharp that you can and crease it so the sides can stand up. 5. Place marks within the cardboard to the trigger buttons plus the strap, then cut them out. Also, you should make holes for your screen and front controls. Paper clips can take the sides together because you fold and measure the placement in the cutouts. 6. Glue the perimeters together once you're at ease with the snug fit and cutouts of your carrying case. Wood glue help keep the cardboard together superior to household glue. The paper clips help keep the way it is together although it dries. 7. Decorate the cardboard any way you like. Use fabric, ribbons, jewels, even colorful duct tape. You can use Velcro or buttons to fasten the foot of your PSP 2000 Shell Case. jklzaeqc 1031
PlayStation Portable owners can engage in downloaded games directly from their PSP with no game disc. These games can be found from Sony you need to include classic PlayStation 1 games and also a mixture of games developed for the PSP 2000 Shell Case. For gamers that n't have an invisible Connection to the web for PSP to download games, software obtainable onto a pc or even a Ps3 and copied for the PSP. Instructions Copy From a PS3 1. Insert a Pro Duo Memory Stick into your PSP containing at the least 1 gb of accessible space. 2. Connect your PSP for your PS3 with all the USB cable. The cable will stick to the mini-USB slot of the PSP as well as a standard USB slot inside Ps3. Power on both consoles. 3. Demand far left on the PSP's cross-media bar and choose "USB Connection" in the "Settings" menu. 4. Make use of your Ps3 controller to pick out "Games", then "Game Data." then this game you need to copy through your PlayStation 3's cross-media bar. 5. Press "Triangle" around the game you need to copy and select "Copy." Then pick the PSP in the list that appears and press "X." 6. Press "O" around the PSP to depart USB mode after the game has become copied. The game are available in the Games area of your PSP. 7. Install Media Go on your computer. This program facilitates downloading games for your PC and copying those to the PSP. 8. Insert a Memory Stick Pro Duo with leastways 1GB of free space into your PSP. Connect your PSP to the pc employing a USB cable and power for the PSP. 9. See a far left on the PSP's cross-media bar and choose "USB Connection" on the "Settings" menu. 10. Open Media Go and drag the game file from a Media Go Library onto the PSP 2000 Housing Case device within the left side of the Media Go menu. 11. Exit USB mode in the event the file have been copied and locate the experience in the "Games" menu on the PSP. jklzaeqc 1030
The Sony Playstation Portable can play games not originally designed for the consoles. With regards to the type of game, rendering it work towards a PSP may be either simple or need a dose of work. No matter what, you will need to make use of a PC to download and install the software program onto the PSP's memory card as there is no other strategy to transfer non-PSP games on the PSP. Instructions 1. Determine the type of game you wish to use the PSP 2000 Repair Parts. At this time, it is simply possible to try out games for older DOS-based PCs, Nintendo, Super Nintendo, Game Boy, Game Boy Advance and PlayStation 1 (sometimes called PSX) within the PSP. 2. Place your memory enclose the suitable slot on your laptop, or connect your PSP in your PC while using USB/mini-USB cable forwarded to your console. Keep the windows open Explorer, and open the memory stick's folder (it's going to be listed to be a separate hard drive under "Computer"). Save the games you intend to play, usually in ".ROM" form inside GAMES folder of the memory stick. 3. Download the proper software to experience the games. For DOS-based Computer games, you will require a free program called "DOSbox for PSP." Download it in the link within the Resources section, and save it to the GAMES folder on your own PSP's memory stick. 4. Download an emulator for your necessary older systems from your link provided in the Resources section. Save the emulator from the GAMES folder of the memory stick. Note that many of these emulators will never help the modern version on the PSP's freeware. When the emulator will not likely run, you may either try one more or customize the PSP's freeware by following the instructions for the link provided. 5. Position the memory stick into the PSP or unplug your PSP on the PC. Start your PSP and navigate to "Memory Stick" through the main menu. Start the emulator you installed and, having its menu, select the game you need to play. Observe that some emulators will demand you to assign buttons corresponding to the older consoles the first time you start them. jklzaeqc 1030
 The best way to Put Movies about the PSP 2000 CaseYou can savor your favorite movie files, music and headings wherever your going while using the Sony PSP 2000 gaming system. As the PSP gives you a Memory Stick Duo slot, use a Memory Stick Duo to upload videos, pictures and other media towards the device. The Sony PSP 2000 supports video in a number of digital formats, including AVI, MP4 and MPEG-4. Instructions 1. Right-select your desktop, select "New" and choose "Folder." 2. Name the folder "VIDEO." 3. Navigate to the movie file you want to transfer towards PSP. 4. Drag and drop the movie file in to the "VIDEO" folder. 5. Insert the Memory Stick Duo to the PSP. Connect the PSP for a PC with all the PSP USB cable. 6. Open the "Start" menu, and click on "Computer." 7. Drag and drop the "VIDEO" folder in the desktop towards the icon that represents your PSP within the Removable Storage part of of the question. The best way to Fix the Analog Plaster over a PSP Slim The Sony PSP Slim can hit hardware issues as being a stuck analog stick. The analog stick can even break-off in certain extreme cases. Reinstalling an analog plaster over a PSP Slim is likely identical to reinstalling one using a PSP Phat, and is also very easy. You should have your PSP Slim running perfectly right away. Instructions 1. Cut your Sony PSP 2000 Bag and remove battery and memory stick in the device. Leave the battery cover off. 2. Remove the two black screws in the battery bay with all your Phillips head screwdriver. Take away the two screws on the opposite side with the device. Remove the final screw at the base in the PSP. 3. Lift the PSP Slim cover away from the device. Use two fingernails to pry off of the analog stick head found on the PSP Slim cover. Pop your new analog stick into the PSP Slim cover and depress firmly. 4. Spray the can of air onto the PSP Slim cover about the analog stick to loosen it. This will make certain the analog stick does not stick. If your analog stick may be the only problem, simply employ the can of air to loosen it. jklzaeqc 1030
The Sony PSP 2000 Housing Case showed some marked improvements in the older 1000 model. However, if you held a PSP 3000 alongside a PSP 2000, you do not initially notice all of the changes and improvements. Screen The screen will be the biggest and most important change in the PSP 3000 model. At first sight, the screen appears as with the 2000, but the 3000 screen creates a much clearer and crisper image while using somewhat less power. Actually, Sony estimates the new screen gives players one more twenty minutes. Microphone Sony PSP 2000 owners who wanted to use Skype for Internet phone calls must get hold of a compatible microphone headset. The 3000 model has a built-in microphone, installed beneath the main screen near to the PSP logo. Within the inland northwest games that requirement microphones for gameplay, meaning the microphone was primarily installed for Skype calling. Physical Changes The 3000 unit is now matte finished, instead of plastic with a higher gloss. The buttons within the home menu aren't semi-circular, but more ovoid. The control buttons are slightly ergonomic on the 3000. Finally, the silver ring around the back on the PSP is identical diameter on both units, though the PSP 2000's ring is all about doubly wide. Unchanged Elements Battery compartment is practically completely unchanged, hence the PSP 2000 battery is also works with the PSP 3000. The MemoryStik Duo compartment is additionally exactly the same. Every one of the buttons have been in the same place, and look almost identical, apart from those stated previously. The headphone/headset jack influences same place. Compatibility Considering that the units look almost identical, many of the cases and bumpers that will work with the PSP 2000 Shell Case will fit about the PSP 3000. It is possible to still work with a PSP-compatible headset to your Skype calling, if you choose. Also you can utilize same MemoryStik Duo. jklzaeqc 1029
|
 RSS Feed